How to Start a Food Blog in 3 Easy Steps
Follow this easy-to-understand tutorial to start your blog today!
- Register a Domain and Select a Hosting Plan
- Install WordPress
- Install a Theme
I have been runing the JustEasyRecipes blog since 2009 and it has just brought me so much JOY!! From creating recipes to photographing and styling food, it has been so much FUN!
You can start one too! TODAY! 🙂
If you like cooking and sharing your recipes, starting a food blog is fun and easy way to share the love with your friends, family and the world! It could even be a craft blog or a sewing blog or a DIY blog or any kind of blog for that matter.
I am going to show you how EASY it is to start your own blog / website. I think many people get confused when they think of starting a website because there is a lot of technical jargon…but to be honest, there are just a few easy steps to follow in order to be up and running. Just like recipes, sometimes the method is way more complicated than necessary.
So let’s jump right in, shall we!! Aren’t you excited???!!! I am!!
STEP 1 – REGISTER A DOMAIN & HOSTING
First of all, you need to select a hosting package – this is basically buying space on a server to store your website files.
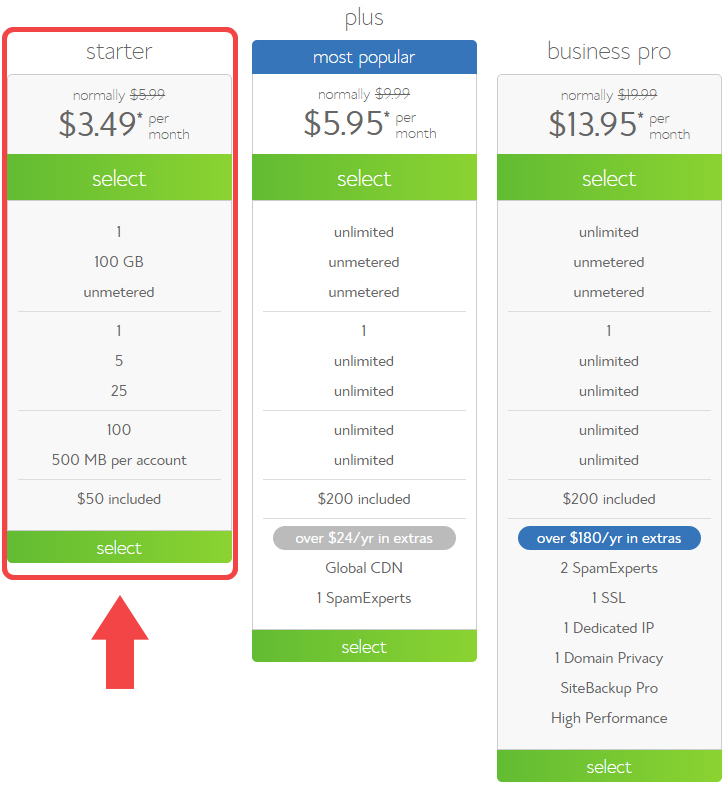
Head over to BlueHost and you should see a box like the one pictured below. I suggest the Starter package – I used this package for another website I run and it is perfect.
The starter package is really affordable but is paid in one lump sum (instead of monthly)…BUT it will save you some bucks in the long run.
Now you need to register your domain, which is FREE if you host with BlueHost. Yes, I know, AWESOMENESS!!
Okay so, this is always my favourite part!! What are you going to call your website? This is known as your domain. (Mine, in case you didn’t know, is www.justeasyrecipes.co.za , excuse me if I am stating the glaringly obvious here 🙂 )
Jot down a few ideas of names and then after selecting your hosting package, you should see a box like the one pictured below.
Enter your domain name there to see if it is available.
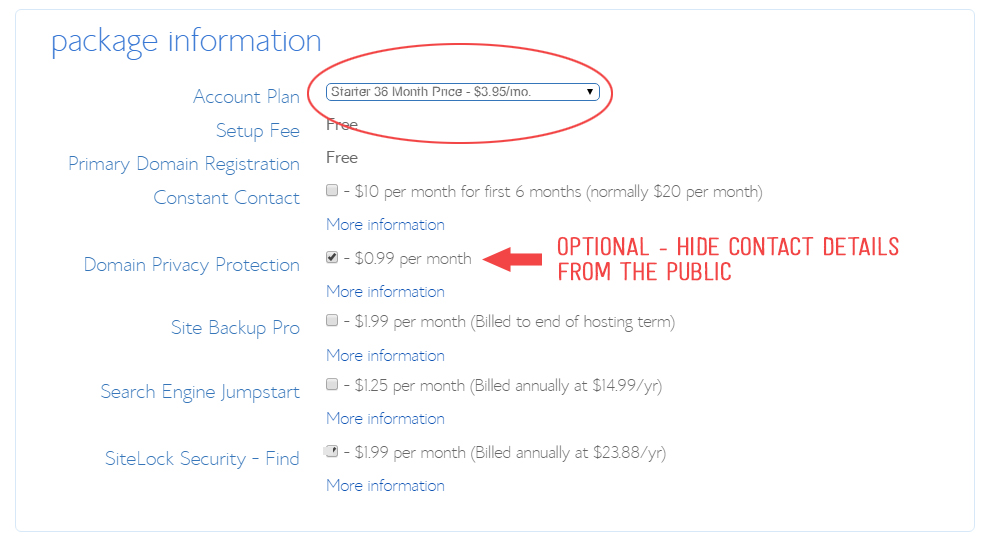
If your domain is available (YAY!), you will then be taken to a page which asks you for account and billing information. Complete your details. For the package info – select your 36 month package which is the cheapest.
Selecting Domain Privacy costs a little extra but it shields your contact details (address, tel phone number and email) from spammers etc. This is optional but I always tick it.
Click SUBMIT to complete your purchase.
Now you will be asked to create a password for your account. You can use the Password Generator to create a strong password, or create one yourself.
STEP 2: INSTALL WORDPRESS
Yeeehaaaa!!! Domain and Hosting done, now to install WordPress.
WordPress is a powerful blogging software, which I might add, is FREE! I use if for all my websites – it’s user-friendly, easy to install and has a large community of developers and users behind it.
Okay so you should have been taken to your hosting panel now, if not (login using the password you just created for your account)
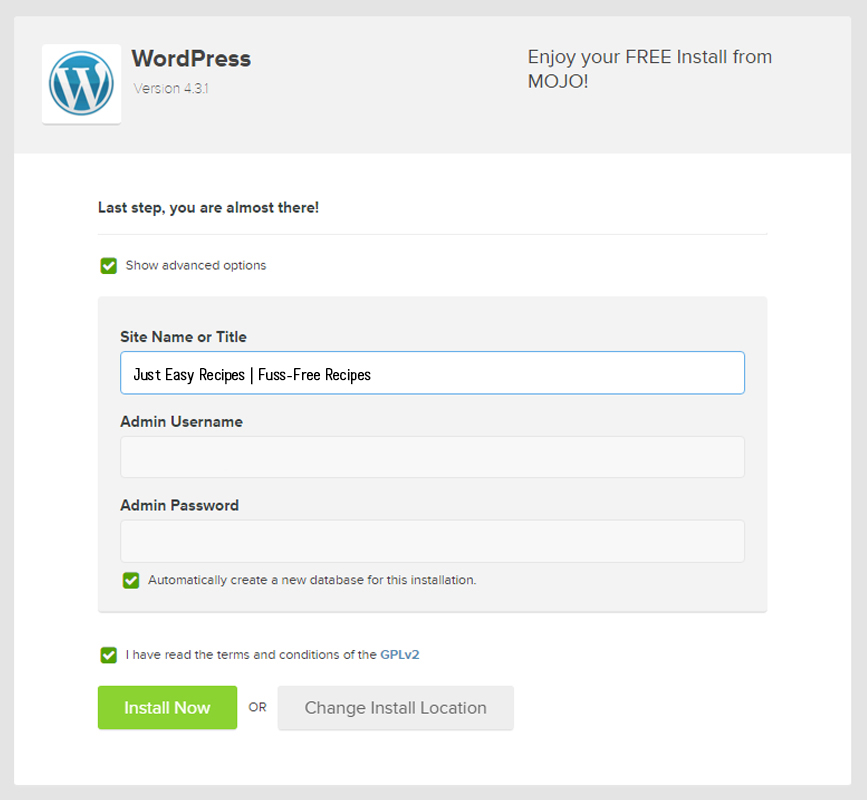
Look for the WordPress icon that says “Install WordPress”. Click on that.
Create your site title (see my example below), and create a username and password for your WordPress installation. Then click “Install Now”
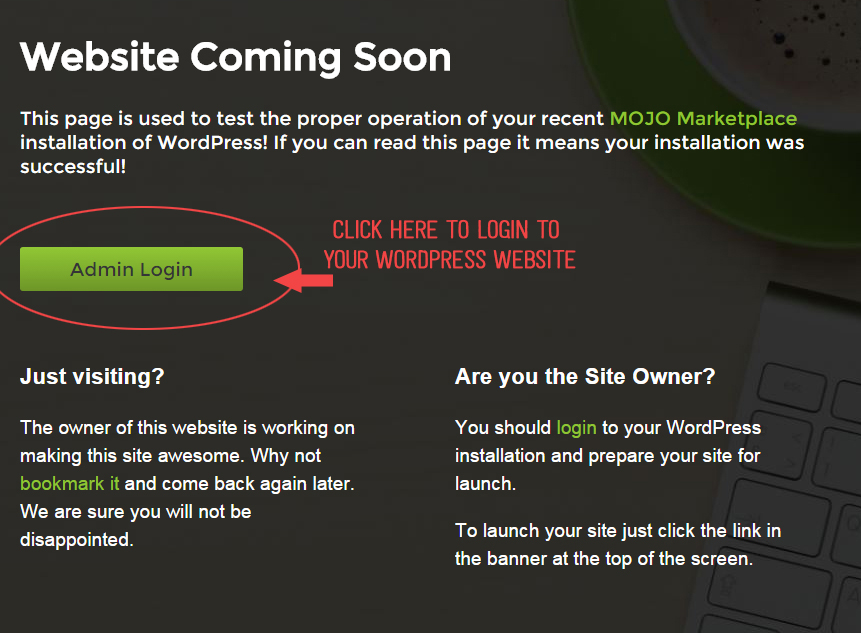
You should now see the “Website Coming Soon” page. Click the “Admin Login” button to login to WordPress.
GUYS!!! You are almost there 🙂
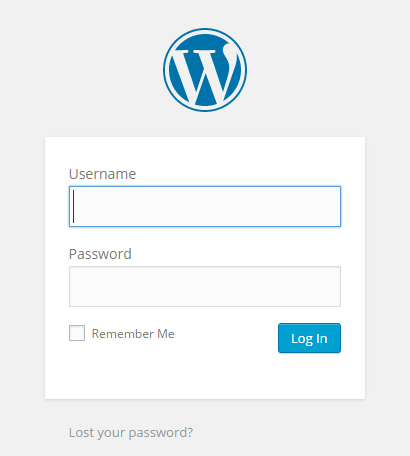
Enter your username and password that you just created.
HELLO WORDPRESS!!!
STEP 3.) INSTALL A THEME
Now you need to install a theme. WordPress has many free themes you can install however I have always found that the premium (paid for) themes are way better as they are updated regularly, have more features and there is usually more support available for them.
For JustEasyRecipes I use the Foodie Pro theme by Shay Bocks. It runs on the Genesis Framework which is essentially a “mother ” theme (and Foodie Pro being the child theme)
Another cool foodie theme is the Daily Dish which also runs on the Genesis Framework.
Whenever you purchase a theme that runs on the Genesis Framework, you will receive 2 downloadable zip files – one for the “child” theme and one for the Genesis Framework or “mother theme”. You need to download these files and save them to your desktop. (Not all WordPress themes have a mother theme, just bear that in mind)
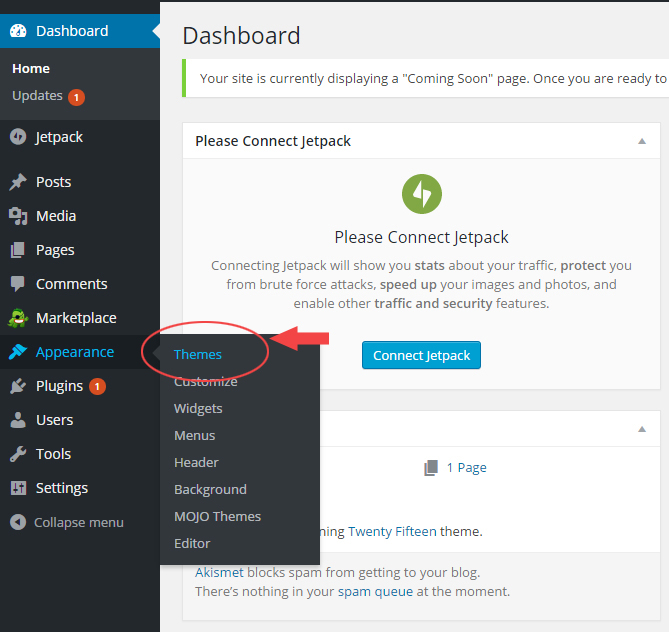
In your WordPress Dashboard, on the left navigation pane, go to Appearance > Themes.
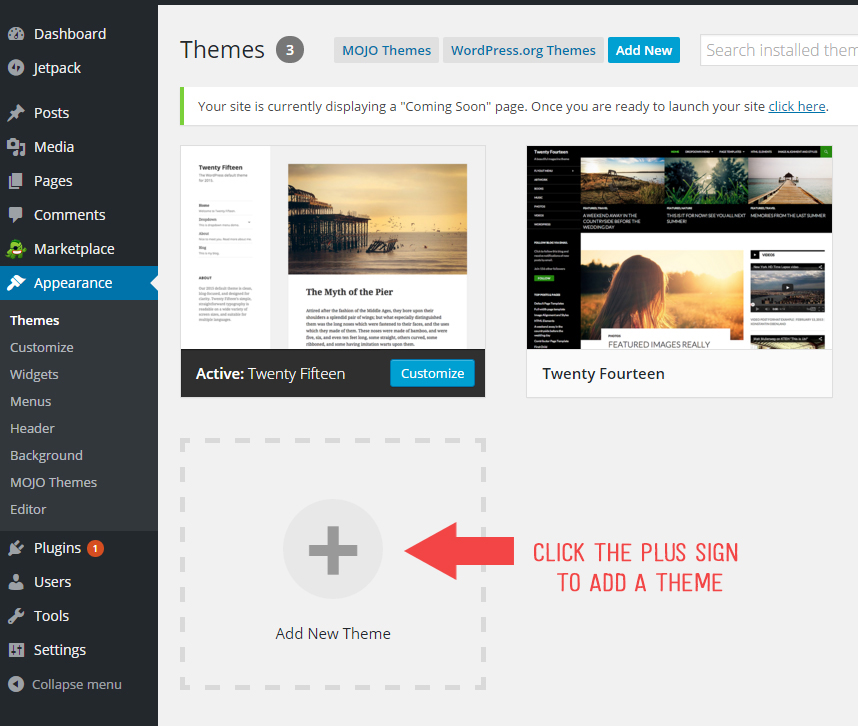
Click the plus sign to add a theme – see pic below.
If your theme runs on the Genesis framework, upload that zip folder first.
Now select the zip folder of your actual theme (or child theme) (which you saved to your desktop) and upload.
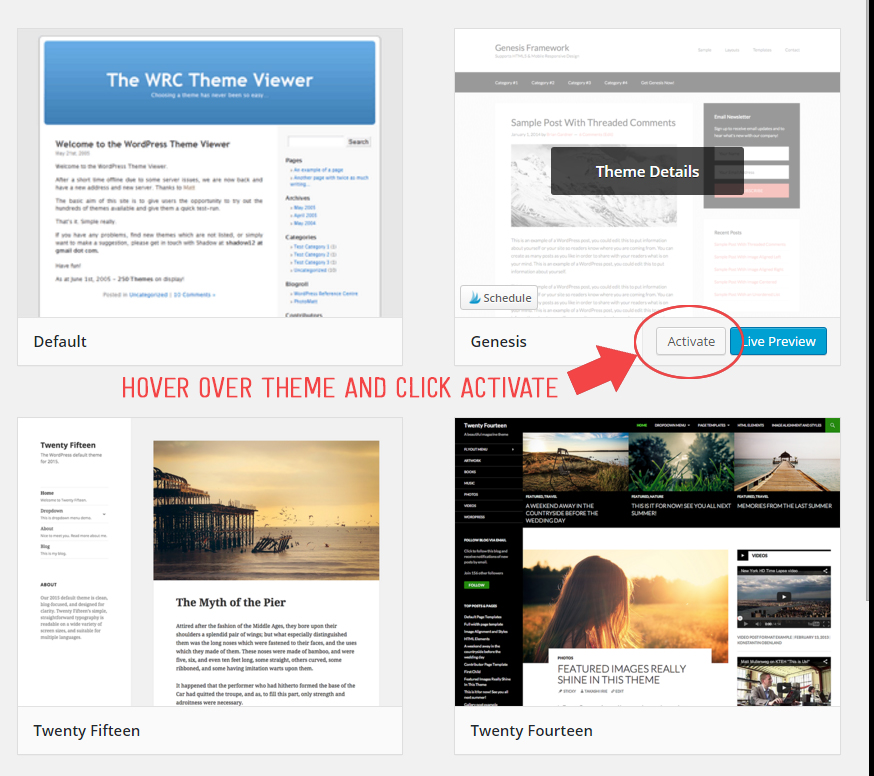
Activate your theme by hovering over the Theme icon and selecting “Activate” in the Themes section.
VOILA! You now have a website. Well done!
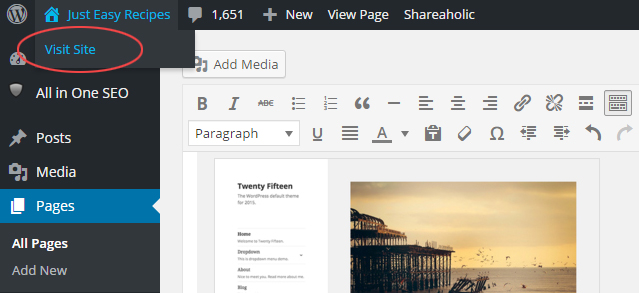
In the top left hand corner of the Dashboard, you will see your website’s name, hover over it and a link to “Visit Site” will take you to see what your site looks like currently.
WAIT! Don’t get a fright. It may not look pretty yet but that is because you need to add some content to it and customize the appearance. I suggest starting off by adding a logo and creating some pages. Once you have done that, create a top navigation menu. Then, why not PUBLISH your very first blog post on something delicious like a triple layer carrot cake or a creamy lasagna? 🙂
If you have any questions, please pop me an email and I will try my best to help you.
X Louise
Disclosure: Please note that some of the links above contain affiliate links which means if you decide to purchase anything through those links, I will earn a commission. I only recommend products that I trust and use myself, and rate very highly.
