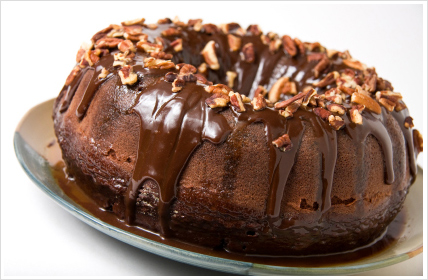
Cake decorating is a sugar art that uses icing and other edible decorative elements to make otherwise plain cakes more visually interesting. Alternatively, cakes can be molded and sculpted to resemble three-dimensional persons, places and things… But don’t worry, we’re not about to go into the complicated art of sophisticated cake decorating. We just want to help you decorate your homemade cake nicely – whether it’s a birthday cake for your child or simply a coffee cake for your next dinner party. These five straightforward and very useful cake decorating tips – such as how to make the icing and what cake decorating tools to use – will have you well on your way to successfully creating a simply irresistible cake!
Plan your pattern beforehand
The very first cake decorating tip we can give you is simply to make sure you plan what you are going to do before you start. Draw the pattern you are thinking of using on a piece of paper or create a picture in your head of exactly how you want the cake to look. Don’t forget to also think about what colours you want to use when it comes to both the icing and the other edible bits and bobs – such as nuts, chocolate buttons, silver balls, jelly tots, hundreds-and-thousands, coconut flakes etc.
Use the right cake decorating tools
It’s important to have the right equipment at hand when you want to decorate a cake as close to perfection as possible. For icing purposes in particular, you should get yourself a proper pastry bag with different decorating tip fittings. A plastic packet you’ve cut a hole in simply won’t do a proper job – unless you have done this plenty of times before and know exactly what you are doing. If you really want to take cake decorating to the next level, you can buy a cake decorating tool kit in a specialty shop or order one online. These kits usually consist of hundreds of little contraptions – such as design templates, scribe markings and stainless steel cutters for flowers, leaves and hearts.
Getting the cake ready
It’s crucial to have a solid and neat cake base if you want the finished product to look good. Whether it’s a chocolate cake or a simple sponge cake, it’s always a good idea to leave the completely cooled cake base in an airtight container overnight before icing and decorating it. Use a cake leveler or a serrated knife to cut off a mounded top of a cooked cake. Turn the cake upside down and use a wide paintbrush to brush away any crumbs – as this will make the icing appear a lot smoother. Split your cake base in half if you want layers, and brush away crumbs again before you start decorating.
How to make and apply the icing
To make the icing mix icing sugar with milk or cream. Adding lemon and vanilla essence adds to the flavour, whilst adding coffee and cocoa works well for a chocolate cake. Make sure your icing is not too runny or too thick – simply add more milk or more icing sugar to get the consistency right. If you are decorating in layers, royal icing works best as it is made with softly beaten egg whites and it creates a hard, smooth surface. If you want to play around with different colours, add drops of food colouring to smaller portions of the icing. When icing the top of the cake, use a lot of icing and don’t let your spatula touch the cake – as you might get crumbs in the icing. And if you’re having trouble icing the sides of a cake just remember not to backtrack; keep icing in one direction and keep plenty of icing on the front of the spatula. Before the icing sets, make your desired pattern with edible decorative elements – such as chocolate buttons or jelly tots.
How to do the writing
When it comes to writing on a cake many people are worried no one’s going to be able to read it or that the writing will run and smudge. Make sure the icing on the cake has set before you start writing, and double-check that the icing you are going to write with is fairly thick. Pick a colour that stands out against the cake’s icing so that you are able read the writing easily. Get a pastry bag to pipe the icing in a nice thin stream – using one of the smallest decorating tip fittings. Squeeze the pastry bag gently to squirt out the icing – practicing on a plate first just to be sure. Keep it short and simple and use big letters so that the writing will be clear. And if you want to make sure your writing is centered on the cake, simply write the center letter first.
These five practical cake decorating tips should easily assist you in creating a beautiful cake for that special occasion. If you are planning to make cupcakes or cookies instead, we’re sure these tips will be useful as well. Have fun, and happy decorating!


Would you have a healthy rusk recipe? And a wheat free one?
Hi Shirley, I don’t have a recipe at the moment but I have just put it on my list of recipes to make and share xx
I agree with you.I hope that helps.