Last updated on January 15th, 2026
Try this Easy Baked Alaska Recipe. Consisting of a sponge cake base with layers of ice-cream and creamy meringue topping, it is the ultimate easy dessert recipe that looks sensational too! The recipe comes together with a few simple and easy to follow steps.

This is definitely my new favourite dessert. I am always amazed at how easy it is, how good it tastes and most importantly, how spectacular it looks.
Dessert should be yum to eat and fun to make, don’t you think? The alternate is yum to eat and want-to-pull-my-hair-out-super-stressful-so-NOT-fun-never-doing-this-again. Well, this recipe is the former, yum to eat and fun to make. I’m on the same page as you guys, trust me!
At first, Baked Alaska looked like a daunting thing to make, with all the layers and all BUT it really is so easy. I am going to show you step-by-step with photos exactly how to make the Best Baked Alaska ever! Let’s go!
Baked Alaska has 3 Components:
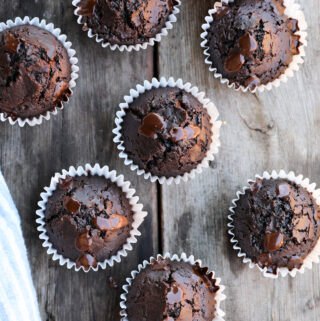
- Cake layer: This is the bottom layer which is typically a sponge cake or pound cake or even a brownie base. The base provides a little strength for the other layers that go on top of it, namely the ice-cream and the meringue. You have two choices here – buy a store bought sponge and cut it to the size of your bowl or use this chocolate cupcake recipe and divide the quantities in half to get half of a layer cake (remember the layer of cake in this dessert is not very thick at all). Or use this recipe for a vanilla sponge.
- Ice cream layer/s: The ice cream layer is usually one or more flavours, and this forms the frozen core of the dessert.
- Meringue layer: A fluffy yet creamy meringue made from whipped egg whites and sugar covers the ice cream and cake, acting as the final layer in the Baked Alaska.
In this Baked Alaska recipe, the images show a base layer of chocolate cake, then chocolate ice-cream, then vanilla ice-cream, then meringue. You can however change the layers of ice-cream to whatever you want, as long as you have cake on the bottom, ice-cream in the middle and then meringue on top!

How do you actually make the Baked Alaska? The Summary:
- The cake and ice cream are assembled and frozen together, often in a glass or plastic bowl (mold) to create a neat, round or dome-shaped dessert.
- The meringue is spread over the entire dessert, sealing it completely to prevent the ice cream from melting. It is then placed in the freezer so the meringue can firm up a little.
- The dessert is then removed from the freezer and using a mini blowtorch, the meringue is browned. Alternately, the dessert is baked in a very hot oven (425 degrees F or 220 degrees C) for just a few minutes—typically 8-10 minutes—until the meringue is golden brown, while the ice cream remains frozen inside. I have personally never tried the oven thing – it just doesn’t seem like a place for an ice-cream dessert BUT I have read many recipes which assure me that the oven works perfectly to brown the meringue whilst keeping the ice-cream intact. We have to fully put our trust in this people!
Video Showing How to Make Baked Alaska
Step by Step Instructions on How to Make a Baked Alaska
- Line the bowl with cling wrap / plastic wrap.

2. Place spoonfuls of vanilla ice-cream in the bowl – about 1.5 litres. It could be more/less than this based on the size of your bowl.

3. Press the ice-cream down so that there are no big spaces. Use the back of the spoon to do this or even your hands over a piece of plastic wrap.

4. Now add spoonfuls of chocolate ice-cream – I used slightly less than the vanilla ice-cream, about 1 litre.

5. Again, press it down. Try work quickly so the ice-cream doesn’t start to melt.

6. Now place the cake layer on top. I used this cupcake recipe batter and poured half the batter into a circular cake tin and made cupcakes with the rest. Alternately you could just make half the batter. And alternately, alternately you could even just buy a sponge cake from the shops and trim to fit the bowl.

7. Tadaa…all snug and in place. Now pop it in the freezer for 3-4 hours

8. Just before removing the dessert from the freezer, make the meringue…
Beat 5 egg whites until fluffy and then slowly add the 1 cup of caster sugar, bit by bit, mixing after each addition until you have added all the sugar. Add in the 1/8 teaspoon Cream of Tartar (if you don’t have this don’t worry you can leave it out – great to have but not essential). Beat the mixture until it forms stiff “peaks” ie. the meringue should hold its shape.
Set aside for now.

9. Get a serving plate ready that is big enough to place the dessert onto. Now using the plastic cling wrap, pull the ice-cream and cake out of the bowl and turn it onto the plate.


10. Peel off the cling wrap. You can see I had a few air pockets in the vanilla ice-cream but that’s okay – we just want to try have as few of them as possible.

11. Coat the ice-cream with the meringue mixture, making the thickness somewhat thinner on the sides and thicker on top.


12. Now using the back of a spoon, dab the meringue to create interesting textures. Try do this quickly.


13. Place the dessert back into the freezer for another 2-3 hours.
When ready to serve, remove from the freezer and using a mini Bruleé Burner /Chef’s Blowtorch, brown the curves and textures of the meringue.
If you do not have a blowtorch then you can place the dessert into a a very hot, preheated oven (425 degrees F or 220 degrees C) for just a few minutes—typically 5-10 minutes—until the meringue is golden brown.
But I prefer the torch, it’s a lot more fun you guys and dessert should be FUN to make.
Ready, set….

Torch it baby!!!

Ooops, got a little too excited in that one patch! Eeek, so the lesson here is: Don’t put the flame too close to the meringue otherwise it will burn.

14. Now ladies and gents, allow the dessert to sit for 5 minutes or so before cutting, just to allow the sponge to de-frost slightly. Everyone, including you, will use this time to marvel at your wonderful creation. Then, grab a large cutting knife and cut that first slice. Remove it slowly, be in awe of the beautiful layers and then silently tell yourself that you are freaking A-MA-ZING!

Isn’t it beautiful?

How about with some lights and sparklers?
And how is it looking now? Do you want to eat it? I know, me too.
Serve quickly and place any leftover cake in the freezer. Leftovers don’t usually happen with this dessert though but I do like to cover all possibilities.

Top view!

Just had to sample some of it whilst I was photographing. Just to check the texture you know.

Creamy and heavenly, you can go make Baked Alaska now.

Thank-you. The end.
Well not really, I have a little more to say.
Baked Alaska Variations
- Instead of meringue on top, you could melt chocolate and pour over the top
- You could use any flavour cake base that you like and the same goes for the ice-cream
- You could add in pieces of chocolate or jello (jelly) into your ice-cream. Ooooh!
Top Tips for Making Baked Alaska
- Use a medium sized bowl – don’t go too big on the bowl otherwise you will have huge portions to cut which is difficult. If you have too big a portion as well, the ice-cream could melt before you have time to eat it!
- Older eggs and ones at room temperature whip up fluffier than fresh, cold eggs! However, it is easier to separate egg yolks from egg whites when they are cold. So if you battle with separating the yolks and whites, do it when they are cold and then allow them to get to room temperature before whisking.
- Make sure the meringue gets to the stiff peaks stage so that they hold their shape on the ice-cream dome.
- Have your cake pieces or cake round ready to place on the ice-cream ie. have it pre-trimmed and ready to go – you don’t want the ice-cream sitting out for too long.
- The ice-cream must be completely frozen before you coat with meringue otherwise it will slide off pretty quickly!
If you enjoy a Baked Alaska, you may enjoy these easy no-bake desserts too:
Print
Best Baked Alaska (Step-by-Step with Photos)
 Prep Time: 30 minutes
- Cook Time: 6
- Total Time: 6 hours 30 minutes
 Yield: 8–10 servings 1x
Description
Try this Easy Baked Alaska Recipe. Consisting of a sponge cake base with layers of ice-cream and creamy meringue topping, it is the ultimate easy dessert recipe that looks sensational too! The recipe comes together with a few simple and easy to follow steps.
Ingredients
- 1.5 litre (50 fl. oz) vanilla ice-cream
- 1 litre (34 fl oz) chocolate ice-cream
- 5 egg whites
- 1 cup caster sugar
- 1/8 teaspoon cream of tartar
- 3–4cm thick sponge cake layer – chocolate / vanilla
Equipment
- Plastic / cling wrap
- glass / plastic bowl apporox 22cm wide (8.5 in) or 9cm deep (3.5 in)
Instructions
- Choose a suitable bowl – I used a glass bowl approximately 22cm in diameter and 10cm deep. I found this to be the perfect size – you really don’t want to go much bigger than this because the dessert becomes difficult to cut.
- Layer a few pieces of cling wrap on the inside of the glass bowl – you will use this cling wrap to pull out the ice-cream and cake once it has frozen.
- Now start adding your ice-cream – I added about 1.5L vanilla ice-cream first, then about 1 litre of chocolate ice-cream. The amount you use may more more or less depending on the size of your bowl. Use an ice-cream scoop to place the ice-cream, then use the back of a spoon (or even your hands over some cling wrap) to press the ice-cream down into the bowl, so that it is compressed and there are no gaps.
- Leave some space for the sponge cake – you want the top of the glass bowl to be flush (in-line) with the cake. You can either buy a sponge cake and cut pieces to form the base of your cake or you can bake a cake ( just halve the recipe as you don’t need a full-sized layer cake, you just need half the cake, about 3-4cm in thickness).
- Place the bowl in the freezer and allow to firm up for 3-4 hours.
- Just before taking the bowl out the freezer, make the meringue. Beat 5 egg whites until fluffy and then slowly add the caster sugar, bit by bit, mixing after each addition until you have added all the sugar. Beat the mixture until it forms stiff “peaks” ie. the meringue should hold its shape.
- Remove the bowl from the freezer. Get a serving plate ready that is big enough to place the dessert onto. Now using the plastic cling wrap, pull the ice-cream and cake out of the bowl and turn it upside down onto the plate.
- Peel off the cling wrap. Coat with meringue, making the thickness somewhat thinner on the sides and thicker on top.
- Now using the back of a spoon, dab the meringue to create interesting textures.
- Place the dessert back into the freezer for another 2-3 hours.
- When ready to serve, remove from the freezer and using a mini brulee burner /chef’s blowtorch, brown the curves and textures of the meringue. Don’t put the flame too close otherwise it will burn.
- If you do not have a blowtorch then you can place the dessert into a a very hot, preheated oven (425 degrees F or 220 degrees C) for just a few minutes—typically 5-10 minutes—until the meringue is golden brown.
- Allow the dessert to sit for 5 minutes or so before cutting, just to allow the sponge to de-frost slightly.
- Slice and enjoy! Yum!
Notes
Number of servings will depend on the size of bowl you used. My baked alaska with bowl dimensions of 22cm wide (8.5 in)and 9cm (3.5 in) deep, provided approximately 8-10 servings.


Leave a Reply