Last updated on May 22nd, 2025
These mini vanilla Crème Brûlées are next-level indulgent — creamy, custardy, crunchy-topped perfection. The recipe is so simple and straight-forward, you need just 5 ingredients and there is nothing scary about it! Even blow-torching the sugar is fun.

Just look at that custard, the cracked sugar topping and the little vanilla seeds! Heaven in a mini ramekin right?!
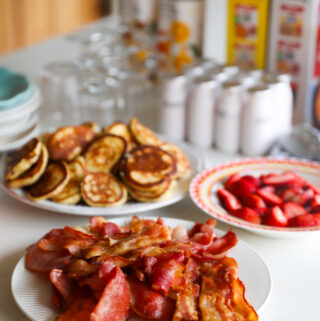
You can make these for a dinner party, afternoon tea with friends or even if you just feel like a mid-week dessert! Mini Crème Brûlées work particularly well for a dessert bar ie. where guests choose 3-4 bite-sized desserts to enjoy.
I love a mini dessert but I don’t love eggs so I never thought I would enjoy Crème Brûlées. Then we went on a skiing trip to France and everything changed! There was a little dessert bar you see and everything looked so cute and tasty, even the Crème Brûlées, especially the Crème Brûlées! They were presented in teeny tiny ceramic ramekins and upon tasting these dreamy custards, I discovered that they didn’t taste eggy at all! I then went, as any reasonable person would do, and got another one. And maybe I ate my child’s portion too.
And so, when I returned home, I investigated these little custard desserts with great fervor! Some said ooooh, you never get it right on the first go or, it can be a tricky thing to get right! But in my personal experience, I had no such thing. Perhaps it was pure custard and caramel luck! These Crème Brûlées were joy straight off the bat!
I had already invested in a mini blow-torch for my Baked-Alaska making-phase. I therefore had everything on hand, except for mini ramekins which I found quite easily and at a reasonable price at a local crockery shop. I purchased the smallest ramekins I could find. I just wanted mini portions, just like we had in France. The size I used was 3 inches in diameter (about 8cm) and just over 1 inch deep (+-3cm) and the size is just right, as Goldilocks would say! The recipe fills about 10 of this sized ramekin.

The sugar layer is real thin, about 1 teaspoon for these 3-inch (8cm) diameter ramekins.

These must be one of the most fun desserts to eat right? Who else loves cracking through the sugar layer with the back of a spoon?
How to Make Mini Crème Brûlées – An Overview (Detailed Instructions in Recipe Card)
1. Make the Custard Base
Whisk together egg yolks and sugar in a bowl. In a saucepan, heat cream with a pinch of salt until just simmering, then remove from heat and stir in the vanilla.
2. Temper the Eggs
Slowly pour a bit of the warm cream into the egg mixture while whisking (this keeps the eggs from scrambling), then combine it all back into the saucepan, slowly, whilst whisking.
3. Fill the Ramekins
Pour the custard into ramekins and place them in a baking dish. Add hot water to the baking dish (not the ramekins) to create a shallow water bath around them.
4. Bake and Chill
Bake until set but still a little wobbly in the center. Let them cool, then refrigerate for a few hours (or overnight).
5. Torch the Tops
Sprinkle sugar on each custard and caramelize with a torch until golden and glassy. Serve as-is or with a fancy garnish.
Watch the Video

Fresh vanilla seeds are highly recommended!

The custard is just perfect – texture, taste, consistency!

The GEAT things about Mini Creme Brulees
- They offer the BEST ratio of custard to crunchy topping
- They’re not too filling – it will leave your guests wanting more and asking you for the recipe, for sure!!
- The custard cooks relatively quickly and easily without becoming rubbery
- Perfect for dessert/ pudding bars.
Top Tips for Perfect Crème Brûlée
- Temper your eggs: Always add warm cream slowly to the egg mixture so it doesn’t turn into scrambled eggs.
- Use a water bath: Place the ramekins in a water bath when you bake them in the oven, it’s essential for that silky, just-set texture.
- Don’t overbake: They should still jiggle a bit in the middle when you take them out.
- Chill time matters: Let them cool fully before torching — the custard needs to be cold so the sugar top doesn’t melt straight into it.
- Get a blowtorch: Honestly, it’s worth it. Trying to grill the tops in the oven can get messy (and soft)

Question and Answer Time!
1. Why is my crème brûlée still wobbly in a bad way?
If it’s too runny, it probably needed a little more oven time. The edges should be set with just a gentle wobble in the middle. And don’t skip the chill time — it needs a few hours in the fridge to firm up properly.
2. Do I really need a blowtorch?
Technically no — you can use the oven grill (broiler) — but a kitchen torch is just easier and gives you that perfect crackly top without heating up the custard underneath.
3. Can I make it ahead of time?
Yes! You can make the custards the day before, keep them in the fridge, and just torch the sugar when you’re ready to serve.
4. What kind of cream should I use?
Heavy cream or whipping cream is best — nothing too light or watery. You want that silky, rich custard texture.
5. Help, it tastes eggy!
That usually means the custard got too hot. Either the cream was too hot when you mixed it in, or it overbaked. Go slow with the heat and use a water bath — it’s worth the fuss.
6. Can I use vanilla extract instead of a pod?
For sure. A small amount (about ½ teaspoon) of vanilla extract works great if you don’t have a vanilla pod lying around.
7. How do I know when it’s done baking?
Give it a little jiggle — the edges should be set and the center should have a soft wobble. It’ll finish setting in the fridge.
8. How long can I keep the custards in the fridge before caramelizing the tops?
You can leave them for up to 3 days in the fridge.

Love Mini Desserts? Try these Mini Custard Tarts next. Or even these Mini Apple Crumbles. I also LOVE these Mini Doughnuts, although not a dessert, they make the perfect sweet treat!

Mini Crème Brûlée Recipe {Best Ever}
Description
These mini vanilla Crème Brûlées are next-level indulgent — creamy, custardy, crunchy-topped perfection. The recipe is so simple and straight-forward, you need just 5 ingredients and there is nothing scary about it! Even blow-torching the sugar is fun. Makes about 10 mini crème brûlées (or 6-8 bigger ones)
Ingredients
- 4 egg yolks
- 130g caster sugar (80g for the custard, 50g for the tops)
- 500ml cream (2 cups)
- ¼ teaspoon vanilla seeds or ½ tsp vanilla extract
- Pinch of salt
Instructions
-
Preheat your oven to 160°C / 325°F.
-
In a bowl, whisk the egg yolks and 80g of sugar together until combined. Set it aside.
-
In a saucepan, heat the cream and a pinch of salt over medium heat. As soon as it starts to simmer (around 70°C / 158°F if you’re into precision), remove from heat and stir in the vanilla.
-
Now, slowly pour about ½ cup of that warm cream into the egg yolk mix while whisking — this step gently warms the eggs so they don’t scramble.
-
Then pour the whole egg mixture back into the saucepan with the rest of the cream, whisking all the way.
-
Divide the custard between mini ramekins (10–12 small ones or 6–8 regular size).
-
Place the ramekins in a large baking dish (or two) and pour hot water into the dish to come up about 1–1.5cm (½ inch) around the ramekins — this water bath helps the custard cook gently and evenly.
-
Bake for 30–35 minutes, depending on your ramekin size. You’re looking for set edges with a gentle wobble in the middle.
-
Remove from oven, then take the ramekins out of the water and let them cool on a rack for an hour. After that, pop them into the fridge for at least 3–4 hours to chill (or overnight if you’re prepping ahead).
-
When ready to serve, sprinkle about 1 tsp of caster sugar over each custard and torch it until it bubbles and turns golden and glassy. That’s your crackly top!
-
Serve just like that, or get fancy with a mint leaf or a berry if you like.


Hi Lou!
I just love your recipes! It is the best, thank you!
Hi Pamela! Aaah thank-you for your comment, means so much! xx